Last Updated on June 14, 2024 by John Coleman
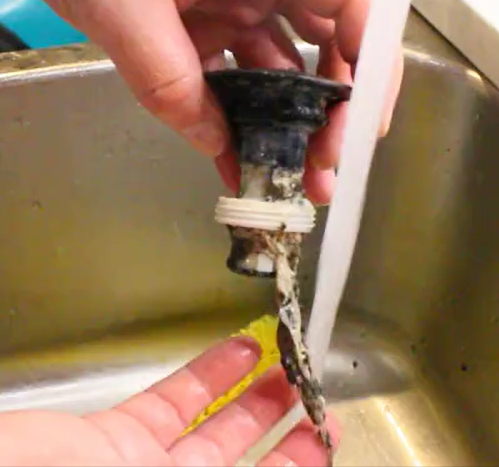
Clogged sinks are an inconvenience many of us face, especially those dreaded clogs caused by hair. With our simple step-by-step guide, you can tackle this problem head-on and keep your bathroom sink running smoothly. Plus, we’ll share unclogging methods to avoid as well as preventative tips to help avoid future clogs.
How Does Your Bathroom Sink Get Clogged with Hair?
Before we dive into the unclogging process, let’s first understand how hair can cause clogs in your bathroom sink. As you wash your hair or shave, loose strands of hair can easily slip down the drain and get caught on any soap scum or residue build-up. Over time, these strands of hair can accumulate and form a solid blockage, preventing water from flowing freely down the drain.
If you purchase through links on this site, we may earn a small commission. See our affiliate disclosure.
Items You Will Need:
- Towels
- Large bowl
- Long pipe cleaning brush with soft bristles (Here is a link to the auto rim cleaning brush like the one I used in the video. It makes it easier to clean because it is wider and can clean with less effort)
Step-by-Step Guide to Unclog a Bathroom Sink Clogged with Hair:
Step 1: Remove Items From Under the Sink
Start by clearing any items from under the sink. Place a large bowl beneath the pipes to catch any water or debris.
Step 2: Remove The Trap
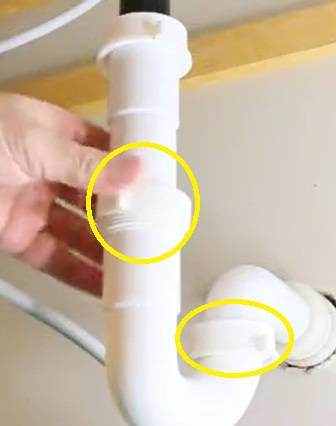
Loosen the ring connectors on the trap connections, gently wiggle, and pull the trap down. You will want to place all the pipes and fittings you take loose in the bowl you placed below the pipes. It makes it easier to transport when you go to clean them.
Step 3: Remove The Fixture Outlet Pipe Extender
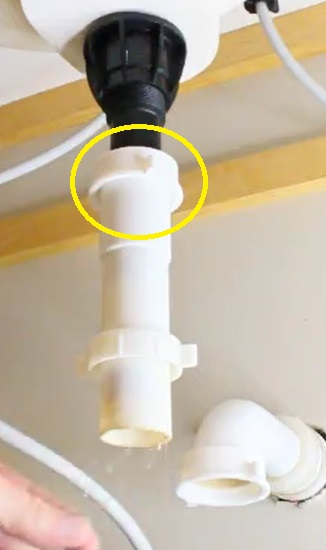
Proceed to loosen the fittings on the fixture outlet pipe extender. Then, remove the extended pipe from the fixture outlet pipe.
Step 4: Remove The Sink Stopper
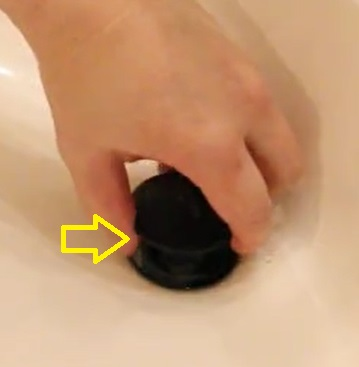
From the top side of the sink and with the sink stopper in the open position, unscrew the sink stopper counter-clockwise. When completely unscrewed, gently pull up and remove.
Step 5: Remove The Fixture Outlet Pipe
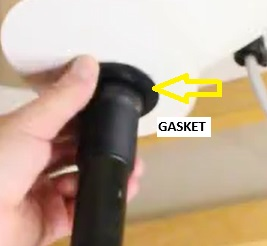
Loosen the fitting that sits snugly against the underside of the sink to remove the fixture outlet pipe. Pull the gasket sitting against the bottom side of the sink off the fixture pipe. Then, pull the fixture outlet pipe out from the top.
Step 6: Clean The Pipes, Fittings, And Sink Stopper

Take the pipes, fittings, and sink stopper to a separate sink and clean them with a pipe brush and warm water. Once cleaned, place them back in the bowl and go back to your sink to reassemble.
Step 7: Begin Reassembling
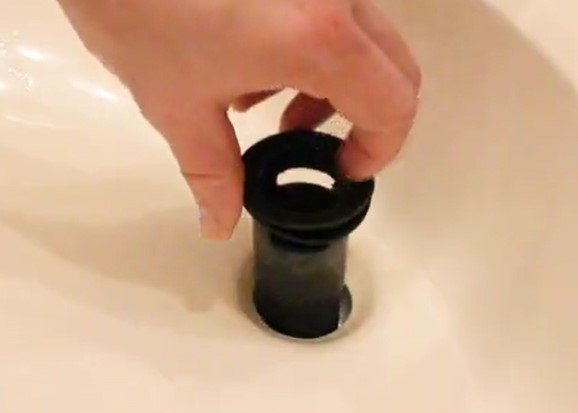
Starting with the fixture outlet pipe, put the first gasket (the thin one) on the fixture outlet pipe and slide it up to the rim (the part you can see from the top of the sink). From the top side of the sink, place the fixture outlet pipe in the hole. (Make sure it sits flush in the hole)
Step 8: Place The Lower Gasket On The Fixture Outlet Pipe
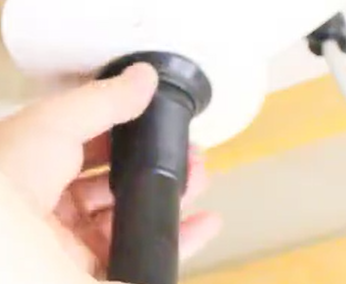
Move to the underside of the sink and place the other gasket (the thick one) on the fixture outlet pipe and slide it up to the bottom of the sink basin.
Step 9: Place The Fixture Outlet Pipe Connector
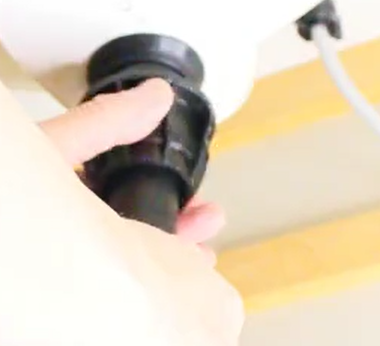
Place the fixture outlet pipe connector and screw it up to the sink basin enough to hold it in place. (Don’t tighten yet)
Step 10: Attach The Fixture Outlet Pipe Extender
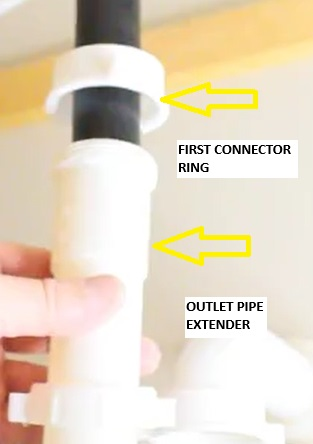
Place the first connector ring on the lower end of the fixture drain pipe with the threads facing down. The insert in the connector should have the beveled side facing down so it fits into the outlet pipe extender. Attach the fixture outlet pipe extender to the connector on the fixture outlet pipe. (Don’t tighten completely yet)
Step 11: Connect The Trap
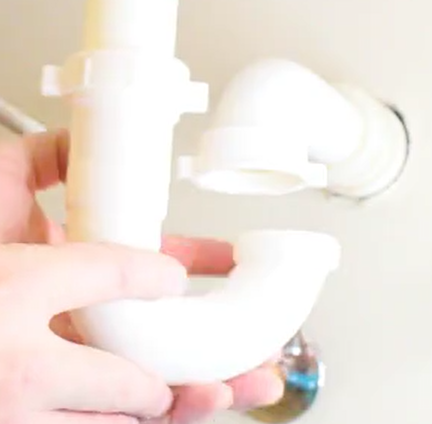
Place the next ring connector the same as you did the first on the lower end of the fixture outlet pipe extender and connect it to the long end of your trap. Connect the other end of the trap to the pipe going into the wall with the last ring connector. (Don’t tighten yet)
Step 12: Tighten The Connectors
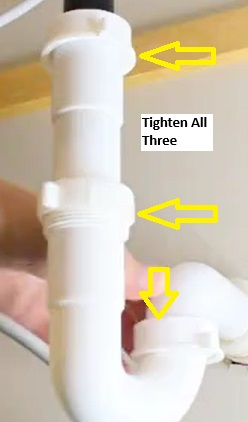
Check to make sure all of the pieces connected are aligned properly. If they are, then tighten all three connectors. (The connectors only need to be hand-tight)
Step 13: Install The Sink Stopper
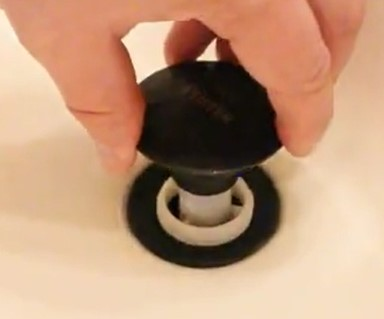
Insert and screw the sink stopper back into place from the top, making sure it’s not cross-threaded.
Step 14: Tighten The Fixture Outlet Pipe Connector
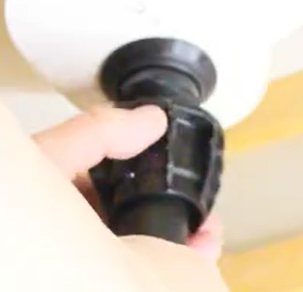
Go back to the underside of the sink and tighten the connector that fits snugly to the bottom of the sink basin.
Step 15: Make Sure All Connections Are Tight
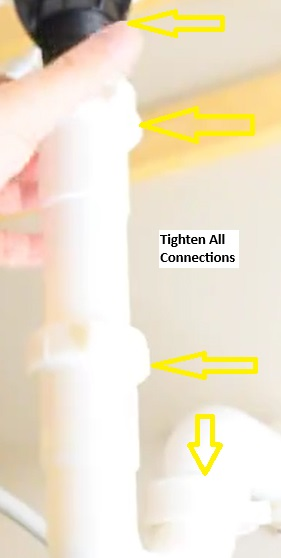
Tighten all connections from the underside, ensuring they are hand-tight and secure.
Step 16: Check For Leaks
Turn on the water and check for leaks. If there are no leaks, Congratulations – you’ve successfully unclogged your bathroom sink!
If you purchase through links on this site, we may earn a small commission. See our affiliate disclosure.
Prevention Tips:
- Hair Catchers: Use a hair catcher or drain strainer to catch hair before it causes a blockage.
- Avoid Hair Washing in Sink: Prefer showering for hair washing to minimize hair loss in the sink.
- Don’t Let Beard Clippings Go in the Sink: For individuals with facial hair, consider a beard-trimming apron to catch clippings and dispose of them in the trash instead of letting them go down the sink.
- Regular Cleaning: Clean the sink stopper and drain regularly to remove buildup.
- Avoid Solids: Keep makeup and similar substances away from the sink to prevent accumulative clogs.
- Hot Water Flush: Run hot water after use to flush down any lingering debris.
Sink Unclogging Methods to Avoid:
- Chemical Drain Cleaners: These can corrode pipes and cause more harm than good. They can also be harmful to the environment and even be a risk to your health if not handled correctly.
- Don’t Use Boiling Water on PVC Pipes: Boiling water can soften PVC pipes, causing damage. Stick to using hot water instead.
- Coat Hangers: Using a coat hanger to remove hair can scratch the inside of the pipes, leading to future clogs. They may also get stuck; making the problem worse.
Conclusion:
Maintaining a clean and unclogged bathroom sink is important for both hygiene and functionality.
Clogged sink drains, especially from hair, can be a nuisance, but with the right tools and techniques, you can clear a clogged sink with relative ease. Implementing regular maintenance and preventive measures can help keep your sink free from clogs and ensure a slow-draining sink becomes a thing of the past.
Remember, while tackling a clogged sink drain is doable on your own, there’s no shame in calling a professional if the situation feels out of hand. Regular care, however, should keep your bathroom sink in top condition, making emergency calls a rare necessity.
Frequently Asked Questions
Q: How do I know if my sink drain is clogged?
A: Some signs of a clogged sink drain include slow-draining water, gurgling sounds when the water drains and foul odors coming from the sink. If you notice any of these signs, it’s best to address the issue before it gets worse.
Q: Can I use chemical drain cleaners to clear a clogged sink?
A: It’s not recommended to use chemical drain cleaners as they can be harmful to your pipes, the environment, and your health if not handled properly. They also may not effectively clear tough clogs like hair.
Q: How often should I clean my bathroom sink drains?
A: It’s a good idea to do a deep cleaning of your bathroom sink drains every few months to prevent buildup and clogs. However, implementing preventive measures such as using a mesh drain cover or regularly flushing hot water down the drain can help keep them clean on a daily basis.
Q: Is it okay to pour white vinegar down the drain?
A: Yes, white vinegar is a natural and effective cleaner that can help break down buildup in your sink drains. It’s also safe to use and won’t harm your pipes or the environment.
Q: What can I do if my sink drain is still clogged after trying DIY methods?
A: If your sink drain is still clogged after attempting DIY methods, it’s best to call a professional plumber. They have the necessary tools and expertise to safely and effectively clear stubborn clogs without causing damage to your pipes. It’s always better to seek help sooner rather than later to prevent further damage and potential costly repairs.


