Last Updated on June 14, 2024 by John Coleman
A concrete patio can often become cracked or uneven over time. What solutions are available to repair cracked or uneven concrete patios?
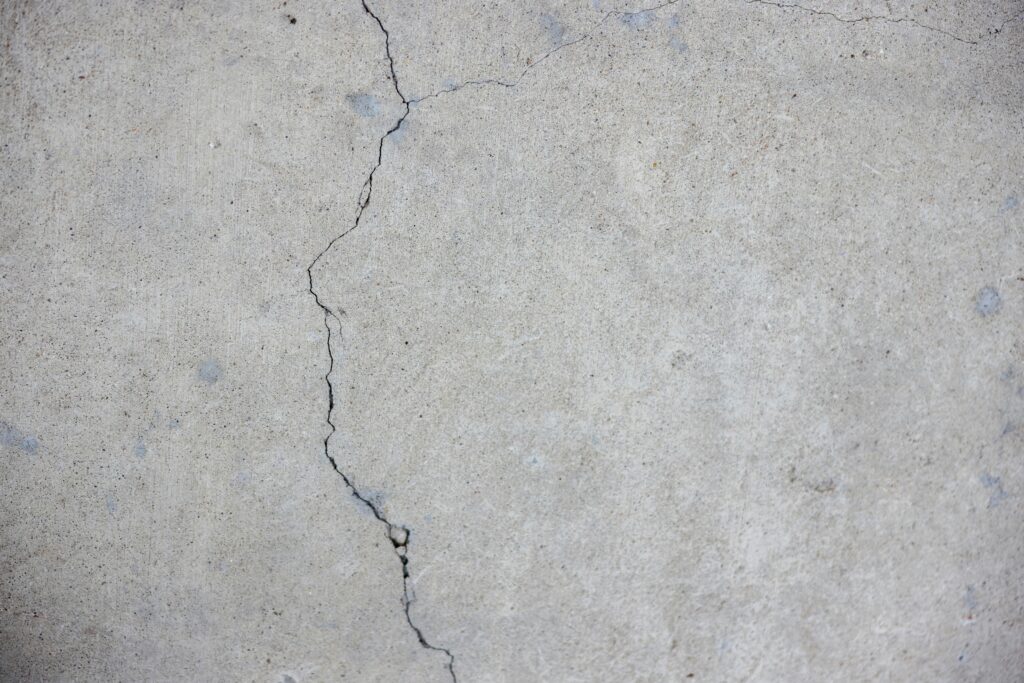
Cracked or uneven concrete patios can be repaired using epoxy, crack sealant, or patching compound for hairline and small cracks. Resurfacing and overlay techniques are used for larger cracks or damaged areas. Significant unevenness may require more complex methods such as slab jacking, also known as mudjacking.

In the realm of home improvement and outdoor aesthetics, addressing the issue of cracked and uneven concrete patios is a concern that many homeowners face. These imperfections can not only detract from the visual appeal of a pool deck or outdoor kitchen/living area but can also pose tripping hazards, making timely repairs essential. This article explores various solutions to remedy these common patio issues, ranging from simple sealing techniques to more complex procedures such as slab jacking. Understanding these methods can empower homeowners to either take a DIY approach or make informed decisions when hiring professionals to bring their patios back to their pristine condition.
What Causes A Cracked and Uneven Concrete Patio?
Before we begin looking at possible solutions, it is important to understand the root cause of cracks and unevenness in concrete patios. While some degree of cracking is inevitable as concrete shrinks and expands due to temperature changes, several factors can accelerate this process. Some common reasons for these imperfections include:

- Poorly compacted subgrade: If the soil beneath the patio is not adequately compacted or has a high clay content, it can cause the concrete to shift and settle unevenly.
- Improper pouring or mixing of concrete: If the concrete was poured too thick, contained insufficient water, or was not mixed adequately, it can result in an uneven surface.
- Tree roots: The growth of tree roots underneath a patio can push up against the slabs, causing them to crack and become uneven.
- Age and wear: Over time, exposure to the elements and frequent use can cause concrete to deteriorate, resulting in cracks and unevenness.
Why Should I Repair a Cracked or Uneven Concrete Patio?
Some homeowners may be tempted to ignore minor cracks or unevenness in their patios, thinking that it is purely an aesthetic issue. However, these imperfections can lead to more significant problems down the road if left unchecked. Some potential consequences of a neglected patio include:
- Safety hazards: Uneven slabs can create tripping hazards, especially for children and the elderly.
- Water damage: Cracks in concrete can allow water to seep in, leading to freeze-thaw damage and potential structural issues.
- Reduced property value: A cracked or uneven patio can detract from the overall appearance and curb appeal of a home, potentially reducing its value.
How to Assess Your Concrete Patio for Damage
Before deciding on a repair method, it is important to thoroughly assess the extent of damage to your concrete patio. This will help determine which solution is best suited for your specific situation. Here are some steps you can take to evaluate the condition of your patio:
- Measure the width of cracks: Use a ruler or measuring tape to determine the width of any visible cracks. This will help determine if they are structural or simply cosmetic.
- Inspect for spalling: Spalling is when small pieces of concrete break off, leaving rough patches on the surface.
- Look for discoloration: If your concrete patio has discolored or darkened in certain
areas, it could be a sign of water damage or underlying issues. - Moisture test (Optional): Use a moisture meter to check the level of moisture in your concrete. Appropriate moisture levels should be no higher than 4.5%. Excessive moisture can cause damage and lead to unevenness.
- Assess the slope: Your patio should have a slight slope or grade to allow water to drain away from your house. Use a level to check if your patio is properly sloped.
- Check for tree roots: If you have trees near your patio, inspect for any signs of root growth that could be pushing up or damaging the concrete.
- Evaluate surrounding landscaping: If you have plants or shrubs near your patio, make sure they are not too close to the concrete. Overgrowth can lead to moisture and damage.
- Consider the age of the patio: The older the patio, the more likely it is to have wear and tear. Take into account the age of your patio when inspecting for damage.
- Look for signs of settling: If your patio is sinking or has areas that are significantly lower than others, this could be a sign of poor installation or soil issues.
If you purchase through links on this site, we may earn a small commission. See our affiliate disclosure.
What Concrete Patio Repair Solutions Are Available?
Your repair strategy hinges on the nature and extent of the damage. We’ve highlighted a range of common repair methods, ensuring solutions for different predicaments.
Repairing Hairline Cracks With Epoxy or Sealant

If your patio has minor hairline cracks, you can fill them with crack filler polyurethane epoxy or a self-leveling crack seal. This solution is easy to apply and will prevent water from seeping through the cracks.
Here are the steps to apply epoxy or sealant:
- Clean the Crack: Begin by sweeping or blowing out the crack to remove any loose debris, dirt, or dust. For a deeper clean, use a wire brush.
- Widen the Crack (Optional): For better filler adhesion, you can slightly widen the crack using a chisel, hammer. I prefer using an angle grinder with a crack chaser blade. This step is optional and typically only necessary for very narrow cracks.
- Wash the Area: Rinse the crack and surrounding area with water to remove any remaining dust and allow it to dry completely.
- Prepare the Filler: If you’re using a two-component epoxy or sealant, mix it according to the manufacturer’s instructions. For single-component fillers, knead and shake the bottle or tube to ensure the contents are mixed.
- Apply the Filler: Cut the applicator tip to the desired size, then gently squeeze the filler into the crack, starting from one end and slowly moving to the other. Ensure the filler is slightly overfilled to account for shrinkage.
- Smooth the Surface: Use a putty knife or your finger (wearing a glove) to smooth the filler over the crack, ensuring it’s level with the surrounding concrete.
- Allow to Cure: Refer to the product instructions for the curing time. Avoid walking on or wetting the area while the filler cures.
- Check and Touch-up: Once cured, inspect the repair. If needed, apply additional filler to any areas that may have shrunk or were not adequately filled
Repairing Larger Cracks with Concrete Patching Compound
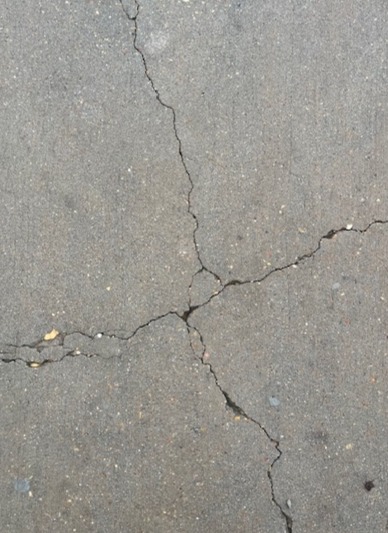
For more severe cracking, you may need a concrete patching compound. After removing debris from the crack, apply the compound using a putty knife and smooth it out with a trowel.
Here are the steps to apply concrete patching compound:
- Clean the Crack: Begin by using a wire brush or a broom to thoroughly clean the crack and the surrounding area of any debris, dust, or loose concrete.
- Wet the Area: Lightly wet the crack and surrounding concrete to prevent the patching compound from drying too quickly, which can lead to poor adhesion.
- Mix the Patching Compound: Follow the manufacturer’s instructions to mix the concrete patching compound to the correct consistency. (There are also premixed patching compounds available)
- Apply the Compound: Use a putty knife or a trowel to fill the crack with the patching compound. Press the compound firmly into the crack to ensure good adhesion.
- Smooth the Surface: Level the patching compound with the surface of the surrounding concrete. A trowel is useful for this step, allowing you to create a smooth, even finish.
- Allow to Cure: Let the patching compound cure according to the product’s instructions. The curing time may vary depending on the product and environmental conditions.
- Seal the Patch: Once the patching compound is fully cured, consider applying a concrete sealer to protect the area and prevent water infiltration.
Resurfacing with Concrete Overlay
For larger cracks or areas of damage, a concrete overlay can be used to resurface the patio. This involves applying a thin layer of fresh concrete over the existing surface, covering up any imperfections, and creating a new, smooth finish. This method is best used for larger cracks no larger than 1 inch wide.
Here are the steps to apply concrete overlay:
- Prepare the Surface: Begin by cleaning the patio thoroughly to remove any dirt, grease, or loose concrete. Use a power washer for the best results, ensuring the surface is free of any contaminants that could prevent the overlay from adhering.
- Repair Significant Damage: If there are any large cracks or damage, fill these with a concrete patching compound before proceeding with the overlay. Allow any repairs to cure fully as per the product’s instructions.
- Prime the Surface: Apply a concrete bonding agent over the entire area to ensure the overlay adheres properly. This step is crucial for a long-lasting overlay.
- Mix the Overlay Compound: According to the manufacturer’s instructions, mix the overlay material. Ensure it reaches the correct consistency for application, which is typically a bit thicker than pancake batter but still pourable.
- Apply the Overlay: Pour the mixed overlay compound onto the concrete patio, starting at one end and working your way to the other. Use a squeegee or trowel to spread the overlay evenly over the surface, ensuring it gets into every corner and covers the entire area.
- Texture the Surface: If desired, texture the overlay while it is still wet to prevent slipping when wet and add aesthetic value. Texturing can be done using a broom, trowel, or specialized rollers.
- Curing: Allow the overlay to cure fully. The time required can vary by product but typically ranges from 24 to 48 hours. Avoid walking on or placing anything on the surface during this time.
- Seal the Overlay: Once the overlay is completely cured, apply a concrete sealer to protect the surface from elements and staining. This will also enhance the color and finish of your new patio surface
Fixing Sunken or Uneven Concrete
Sunken or uneven concrete can be fixed by utilizing a process called mudjacking or slabjacking, where small holes are drilled into the concrete, and grout or foam is pumped underneath the concrete to lift it back into place. This method is often used for larger areas of sinking or uneven concrete. This method is best performed by foundation repair specialists because it requires precision.
Replacing Damaged Sections
In more severe cases, it may be necessary to replace the damaged section of the patio entirely. Of course, this is in the worst-case scenario and can be a more costly option, but it ensures a long-term solution for significant damage.
Concrete Patio Repair Solutions to Avoid
When considering ways to repair your concrete patio, some solutions should be avoided. These include:
- Polymeric Sand: While this may seem like a quick and easy fix, polymeric sand is not suitable for filling cracks or repairing damaged concrete. It is meant to bond joints between pavers and prevent weed growth.
- Dry Concrete Mix: It may be tempting to sweep dry concrete mix into cracks or holes and then add water, but this is not an effective solution. The mix will likely crack and crumble over time, causing further damage.
If you purchase through links on this site, we may earn a small commission. See our affiliate disclosure.
Preventing Future Damage to Your Concrete Patio
Once your patio has been repaired, it’s important to take steps to prevent future damage. Here are some tips to keep your patio in good condition:
Sealing and Waterproofing
To prevent future cracking and damage, it’s essential to seal and waterproof your concrete patio. This can be done using a concrete sealer that will protect the surface from water penetration, UV rays, and other environmental factors.
Proper Drainage
To avoid water pooling on your patio, ensure that there is proper drainage in place. This can be achieved by sloping the surface away from your home and installing drains or gutters to redirect excess water.
Regular Maintenance
Regular maintenance is crucial for preventing future damage to your patio. This includes regular cleaning, removing any debris or standing water, and addressing any small cracks before they have the chance to become larger.
Other Aspects to Avoid Future Damage
Be mindful of distributing heavy loads evenly. Minimize the use of de-icing salts in winter, as they can accelerate concrete deterioration.
Your repairs are essential, but maintaining them is where the true transformation lies. A well-maintained patio can better withstand the elements and last decades.
Conclusion: The Unrivaled Satisfaction of Successful Patio Repair
To ensure your patio’s concrete remains visually appealing, functional, and long-lasting, it is essential to repair any cracks or uneven areas. This article provides a detailed guide to help you achieve this goal through steps such as sealing, waterproofing, and regular maintenance. By proactively caring for your patio, you not only protect your investment but also preserve its beauty and structural integrity for years to come. Dedicate time to maintaining your outdoor space now for lasting satisfaction and enjoyment in the future.
Frequently Asked Questions
How long should a concrete patio last before cracking?
While a concrete patio can last for several decades with proper maintenance, it is not uncommon for small cracks to appear over time due to natural settling and weather conditions. However, these can be easily addressed through regular repairs and maintenance.
Can I repair my concrete patio myself or should I hire a professional?
Small cracks and minor damages can often be repaired by homeowners themselves with the right tools and materials. However, for more significant issues or if you are unsure of how to properly repair your patio, it is recommended to hire a professional for the best results.
How often should I seal my concrete patio?
It is recommended to seal your concrete patio every 1-3 years, depending on its exposure to elements such as sunlight and moisture. Annual inspections are also recommended to catch any potential issues early on.
What are some signs that my concrete patio needs to be resealed?
If you notice discoloration, fading, or water pooling on your concrete patio, it may be time for a new seal coat. Additionally, if cracks or chips start to appear even with regular maintenance, it may also be an indication that the patio needs to be resealed.
Will hairline cracks in concrete get worse?
Hairline cracks, also known as surface cracks, are common in concrete and are typically superficial. If properly maintained, these small cracks usually do not get worse. However, it is important to address any larger or widening cracks promptly to prevent them from becoming a bigger issue.
Can I use salt on my concrete patio during winter?
While salt can help melt ice and snow on your concrete patio, it can also cause damage and deterioration over time. It is recommended to use alternative de-icing methods such as sand or calcium chloride to prevent potential harm to your patio.


